
Below are the instructions for the February 2026 Grab & Go kits! Grab one only in the Youth Department at the Library. While supplies last.
PLEASE PAY ATTENTION TO THE GRADE RECOMMENDATIONS!
Snowboarder Game
Each kit includes:
- 1 paper plate
- 1 snowboarder
- 1 popsicle stick
You will need:
- Markers/crayons/paint
- Scissors and an adult to help
Steps:
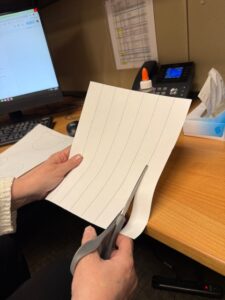
- Color in the snowboarder
- Have a grown up help you cut out the snowboarder
- Take the white strip off of the popsicle stick and stick on your snowboarder (it’s self-adhesive)
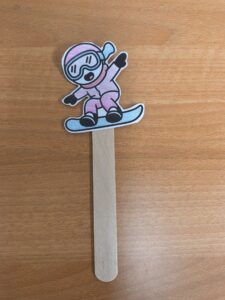
![Snowboarder Step 1]()
- Lay your plate with the bottom facing up. Look at your paper plate with the cut out running from left to right. Choose which part of the plate should be the sky and which should be the snow.
- Color a sky and some snow drifts, using any materials you have on hand.
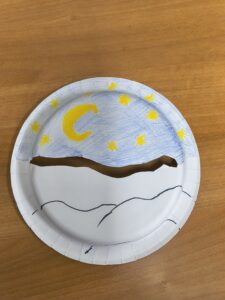
![Snowboarder Step 2]()
- Place your popsicle stick through the cutout and move your snowboarder up and down the slopes!
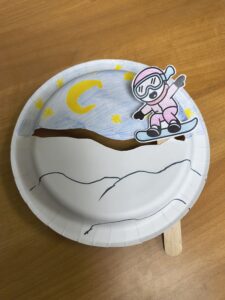
![Snowboarder Step 3]()
Paper Chain Polar Bear
Create a fun winter friend with this activity kit!
Each kit contains:
- One paper divided into 7 sections
- One paper with bear head and paws
- 2 eye stickers
- 1 piece of yarn
You will need:
- Scissors
- Glue
- Markers or crayons
- Cut the strips of paper into 7 pieces.
![IMG 8268]()
- Glue the first strip together on the ends.
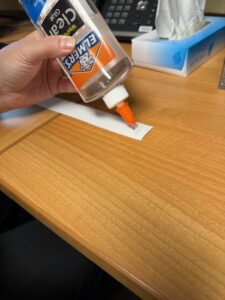
![IMG 8272]()
- For the second link, thread a strip of paper through the first loop.
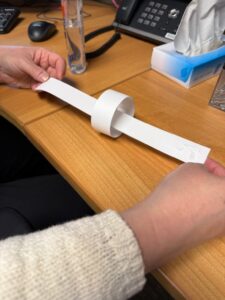
![IMG 8273]()
- Glue the ends of the second link.
- Continue linking the strips of paper and glueing them together to create a chain.
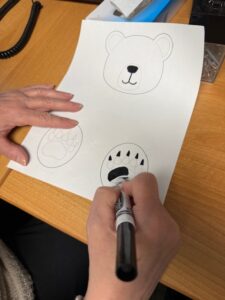
- Cut out the bear’s head and paws.
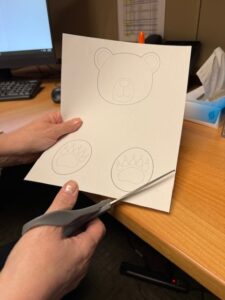
![IMG 8269]()
- Color in the head and paws.
![IMG 8274]()
- Add the eye stickers.
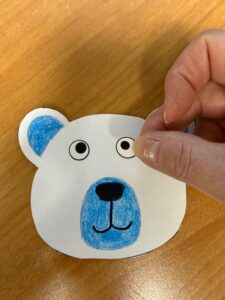
![IMG 8275]()
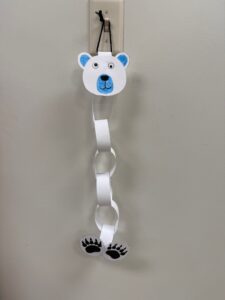
- Glue the head and paws to the chain.
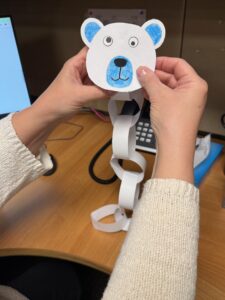
![IMG 8276]()
- Add the yarn by tying it around the top loop behind the bear’s head if you would like to hang your polar bear!
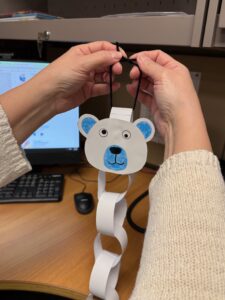
![IMG 8277]()
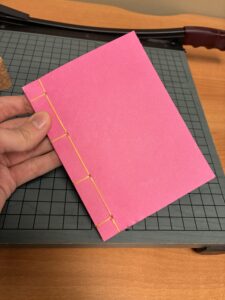
Book Binding
Well, we are a library, and our main goal is to ensure that books are as accessible to you as possible. The only way we could make books more accessible is by giving you the ability to make your own! This craft is the first step towards that goal, teaching you how to use stab binding to bring loose pages together into a whole book. The version of stab binding that we’ll be going over here (Yotsume Toji, or roughly, “Four Holes”) is a standard pattern of Japanese origin, but there are tons of fascinating variations and patterns out there. Let’s take a look!
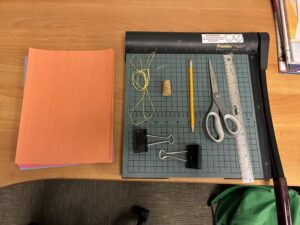
In addition to the materials from within the kit, you’ll need a few things from around the house.
Each Kit Includes (List):
- 13 sheets of construction paper, folded
- A Sewing Needle, a Cork, and a Paper Clip, all attached together.
- ~60 in. of waxed thread
You Will Need From Home (List):
- Ruler
- Scissors
- Surface typically safe for cutting on, e.g. a cutting mat or cutting board
- Pencil
- A couple of sturdy/wide clips, e.g. bulldog clips, binder clips, or clothes pins
Step-By-Step:
- Decide what size you want your book to be, and cut your paper to roughly that size with your scissors. If you cut the paper to a small size, you’ll likely have extra thread, so don’t feel like you have to use all the paper if you want to make a couple books. Even if you want to make the pages different lengths (for a very interesting kind of book) they should at least be all the same height. Finally, if you need a recommendation on size, the papers are folded in half twice, and I just cut the pages along both of the folds in my example to make a good size book.
![Book Binding Step 1]()
- Next, make a template for your hole-punching that is the same height as your book, using one of the provided papers or a paper from home. Using a ruler on your template, draw a line parallel to the book-height edge, 15mm (about a half-inch) away from it. Mark your first dot (1) on that line 15mm (½in) down from the top, and another one (numbered 4, which will make sense soon) 15mm (½in) up from the bottom. Next, measure the distance between dots 1 & 4 and divide that number by 3. Measure, using that divided number, down from the top dot (1) and mark another dot (2) and up from the bottom dot (4) and mark a final dot (3) on the original line. Place your template on top of your pages, and secure your template and your stack of pages together and steady by using your clips– binder clips, bulldog clips, or clothespins.
![Book Binding Step 2]()
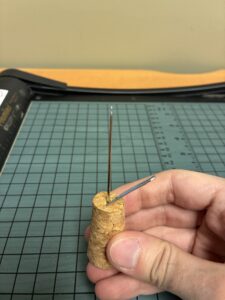
- Next we are going to make your awl, the tool that will let you punch a hole evenly through your pages. Currently, your needle is in your cork pointy end first– you’ll want to reverse that and put your needle in the cork pointy end facing out. The needle can be hard to remove when stuck in the cork, so use the attached paper clip to gain leverage– but like any time you’re handling something sharp, be careful with the needle, and make sure to remove it from the cork in a direction away from you. Once the needle is out of the cork, work the eye of the needle into the space that the pointy end of the needle was at. You might need to widen the hole in the cork a little more (with the needle’s point) if the eye has trouble fitting in. Make sure that the needle is perpendicular to the flat side of the cork, and it’s not coming out at an angle. Finally, make sure that you’ll be able to remove the needle from the cork at some point– you’ll need it later! I did this by leaving the paperclip in the needle’s eye and making sure that I was still able to grab it, to have leverage again.
![Book Binding Step 3]()
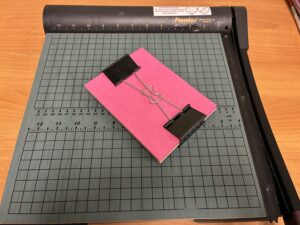
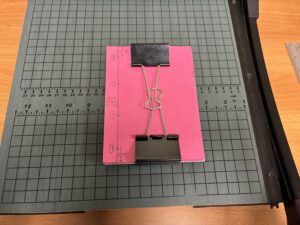
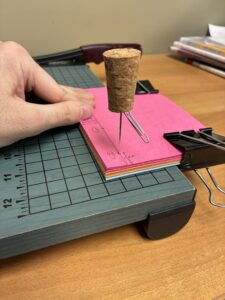
- Once you have your awl, you can punch your holes through your paper. Place a cutting mat or board (any kind of board, really) under your paper. Place your awl at a 90 degree angle to your book, and push down to make holes that go straight down through every page in your book stack. This will take both a good amount of pressure and keeping the awl pretty steady. I also would recommend making a couple stabs if possible to make the hole a good bit wider– this will make it way easier to thread the needle through the hole later. I would do this by stabbing the paper slightly above and slightly below the dot you made, and then using the awl to break through any paper remaining between the two holes. Once you’ve made sufficiently sized holes at spots 1-4, remove your template, but keep the other pages secured and even with the clips.
NOTE: If you’re having trouble with making or using the improvised awl, you can use any other method to punch a hole in your paper– for example, repeated and precisely measured use of a hole puncher would be one of them.
![Book Binding Step 4]()
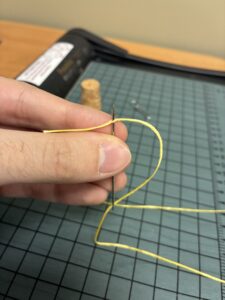
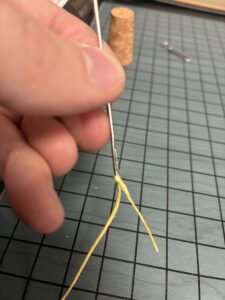
- Next, you’re going to want to take the needle out of the awl (I used the paper clip, pointing the needle away from myself) and cut a length of thread five times the height of your book. That will be the length of thread that you’ll use to sew your book together. Then, thread your needle, which will work a little differently with waxed thread. Pinch the tip of your thread to flatten it, and pass that through the eye of the needle. Then, pinch the thread again, this time an inch from the end of the thread that you just passed through the needle. Pierce the tip of your needle straight through the shaft of the thread at the point you’re pinching it.
![Book Binding Step 5]()
Pull the end of your thread though the pierced shaft…
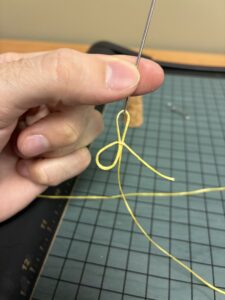
![Book Binding Step 6]()
And, pull the loop you’ve formed very tight to seal it on!
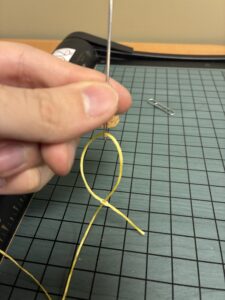
![Book Binding Step 7]()
![Book Binding Step 8]()
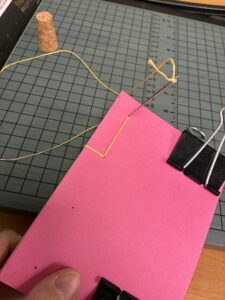
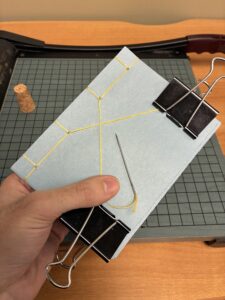
- You’re ready now to sew your book together! To ensure your book stays together, you’ll need to make sure it’s sewed evenly and in a fairly precise pattern. Starting at the back side of the book, at the second hole from the top (2) bring your needle up through all the pages, leaving a tail which you will use to tie the thread off at the end. (I trapped that tail in one of my clips to keep it secure.)
![Book Binding Step 9]()
Take the needle round the spine and back into the same hole (2), forming a loop. Continue up to the top hole (1) and go through its front. Go around the spine and back through the front of (1) forming a loop parallel to the first one you made.
![Book Binding Step 10]()
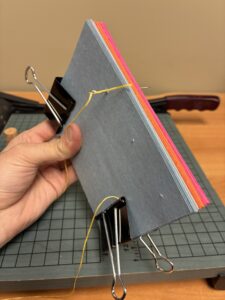
Then, go over the top end of the book and back into the same hole (1) forming another loop perpendicular to the other two. Make sure to keep the thread tension nice and firm. Take your needle into the back of the second hole down (2), and come back to the front where you started.
![Book Binding Step 11]()
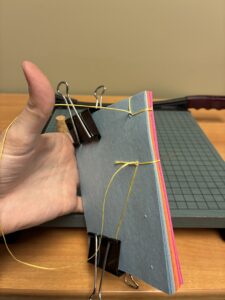
You’re halfway there, and a pattern is starting to appear! Sewing the second half is pretty similar to the first– go through the front of the next hole (3), wrap around the spine and form a loop by going right back into the front of that same hole. Bring your needle up through the back of the bottommost hole (4) and wrap around the spine coming back into the same hole (4), a parallel loop. Go over the end of the book and back into the same hole (4), a perpendicular loop. You should now take your needle down the next hole (3). If you turn the book over, you should see one final space.
![Book Binding Step 12]()
Fill that space by tying off the thread. Make a loop with the needle around the thread coming out of the second hole, and go back through that loop with your needle to make a knot. Tighten that knot, then make the knot again two or three times around the same thread to make sure it won’t come undone. For a slightly neater look, you can cut the ends of the dangling thread short and tuck them back into the second hole, but (like me!) you just might like the way it looks as is.
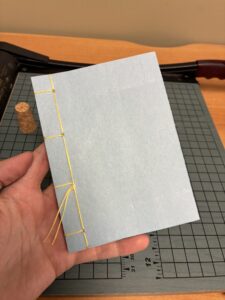
![Final Book 2]()
- With the above done, do with your completed book as you see fit! Decorate its “cover” and draw, write, or make whatever you want on the inside and outside– make your book your own!
Finally, if you’re curious to learn more, you can look up and explore additional ways to stab bind books! The pattern used here was the one I learned to do first, (via this website), but if you want to try your own, go for it! There are many different patterns already out there, and of course, you could always experiment with different kinds of paper, thread, and tools! It’s all yours now– go forth!