
Below are the instructions for the April 2025 Grab & Go kits! Grab one only in the Youth Department at the Library. While supplies last.
PLEASE PAY ATTENTION TO THE GRADE RECOMMENDATIONS!
Instructions for the Pre K and Kindergarten activity are in each kit.
Tissue Paper Flowers
Materials:
- 5 squares of tissue paper
- 1 green pipe cleaner
(this kit contains enough material to make 2 flowers)
Instructions:
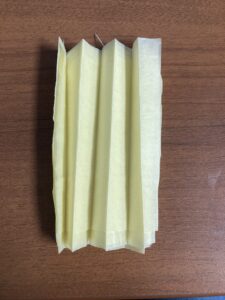
- Stack 5 tissue paper squares on top of one another

![Step1]()
- Accordion fold the stack of squares
![Step2]()
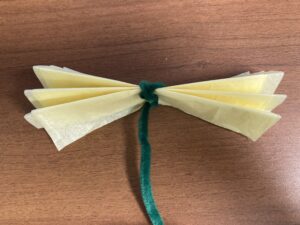
- Fold up your accordion fold. Wrap your pipe cleaner around twice down the center and twist it closed
![Step3]()
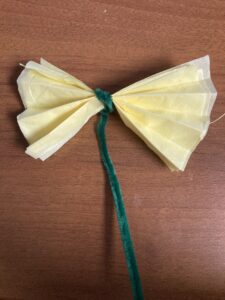
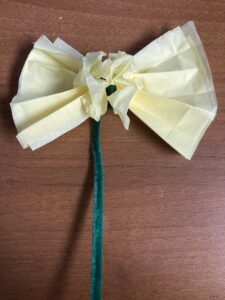
- Carefully fan out both sides of the fold
![Step4]()
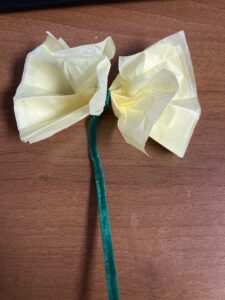
- Carefully separate the top layer of tissue paper, pulling each side up and towards the pipe cleaner center
![Step5]()
- As you pull up each layer, scrunch and fluff it in the shape of flower petals
![Step6]()
- Repeat #5-6 with each layer of tissue paper until you have a beautiful flower!
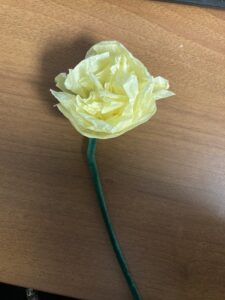
![Finishedproduct]()
April is the time of year many of you will start thinking about the summer, your plans for that time, how you’ll make your mark. Here’s a fun, straightforward way to make a mark– a customizable stamp block, and a postcard to stamp with it!
Using the materials included in the kit, you’ll be able to repeatedly paint whatever shapes or patterns your heart desires.
Each Kit Includes:
- 1 Wooden Block
- 4 Squares of Adhesive Foam
- 1 Mini Paint Pot (With Paint)
- 2 Cupcake Liners (Palettes)
- 1 Postcard
You Will Need:
- Scissors
- Pencil for tracing
- Anything! Once you’re done experimenting with the postcard, the stamp can be used to make whatever you’d like!
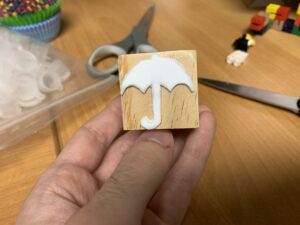
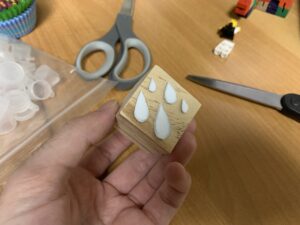
Step 1: Shape your Stamps!
Cut a few shapes that you’d like to stamp out of your foam squares! To commemorate this rainy month, I cut out an umbrella and some raindrops I drew. As the foam squares are already the same size as the cube’s sides, you don’t have to worry about it being too big. After you’ve cut out your shape, remove its paper backing, reveal its adhesive underside, and stick it on any side of your block.
Step 2: Prep Your Paint!
Pour some paint from your paint pot into one of your cupcake wrappers, or your “Palette”. Try not to pour too much at once– only a thin layer on the bottom of the palette is needed to coat the surface of the stamp. Don’t be worried if the bottom of the wrapper feels a bit cold and damp, though you can double layer your wrappers if you like. Then, get ready to start stamping!
Step 3: Pattern your Postcard!
Dip your newfound stamp into the paint to get started. You might have to tilt the block in at a few different angles in order to fully cover the surface of the foam– experiment! If you get some paint on the block itself, or around the foam, you can wipe it off if you like. Then, lightly press your stamp onto the card to stamp it with your pattern, and repeat! You can see the patterns I made on some test strips below!

Step 4: Experiment!
After you’ve hammered out the basics, it’s time to experiment! You can write a message on your postcard and send it out to whoever you like, or keep it for further testing. You can also keep and use your stamps for whatever artistic project you can think of! With the right paint, it’ll let you make patterns on stationary, clothes, home decor, and a ton more. Have fun, and happy stamping!