
Below are the instructions for the August 2025 Grab & Go kits! Grab one only in the Youth Department at the Library. While supplies last.
PLEASE PAY ATTENTION TO THE GRADE RECOMMENDATIONS!
Take a deep dive with this fun octopus puppet craft!
Supplies provided:
- Colored paper (will vary)
- Two eye stickers
- Popsicle stick with adhesive
Supplies needed from home:
- Child-friendly scissors
- Marker
- Pencil (unless you’re using a thin marker)
- Tape
Instructions:
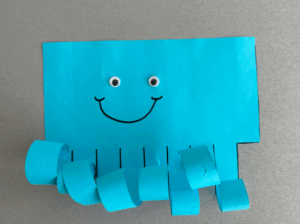
- If possible, have your child cut on the solid lines of the colored paper. Make sure they stop at the end of each line. Using scissors is a great way to develop your child’s fine motor skills. If your child can’t do this step, feel free to do the cutting for them.
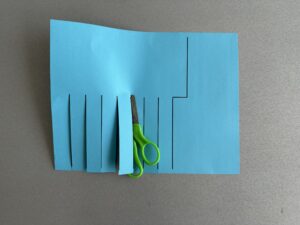
![Step 1]()
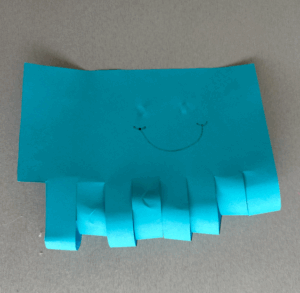
- When you come to the last line, cut up, over, and then up to the edge of the paper to separate that piece from your octopus.
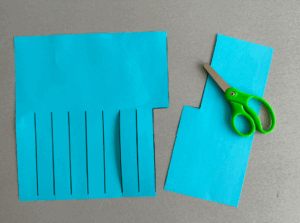
![step 2]()
- Now add the eye stickers and a mouth for your octopus. If you want to add any decoration to the eight arms of your octopus, now’s the time! Otherwise, you can leave them blank like I chose to.
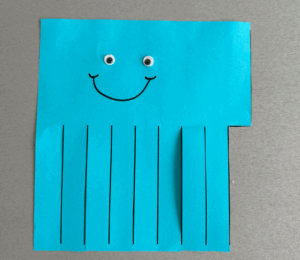
![step 3 1]()
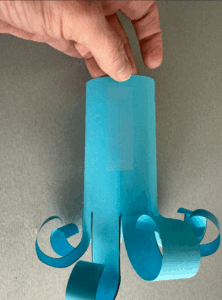
- Using the pencil or a thin marker, roll each arm of the octopus to curl it.
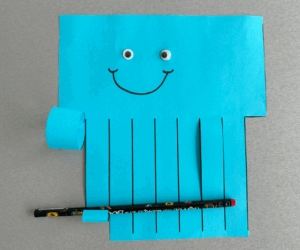
![step 4]()
![step 4.5]()
- Flip your octopus over so that it’s facing down.
![step 5]()
- Now roll your octopus into a tube and tape it closed. The octopus body will meet where the overlap is.
![step 6]()
- Add the adhesive popsicle stick to the inside of your octopus to make it a puppet (if you choose).
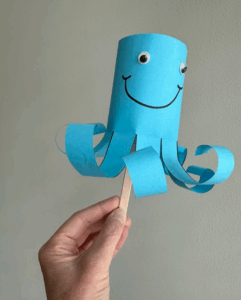
![step 7]()
- What adventures will your octopus have? Will it be an underwater octopus or maybe an octopus in space?!?!
![Untitled design 2]()
![octopus in space]()

DIY Spinners
Activity for August Teen Grab & Go: Solar Ovens
Intro:
In this hot and muggy month, everyone talks about wanting to beat the heat. But, what if you embraced the heat instead, allied with it? Would you and the heat not be stronger if you worked together? Imagine what you and the heat could accomplish together, as partners– that’s right! You can cook food with heat! Let’s rig up a solar oven and use the sun outside to do just that.
Materials and Final Product Images:
You can use the materials below to create a basic solar oven that you can use to warm up or even make a variety of foods. The Solar Oven becomes especially useful when you’re away from modern cooking tools, like for any camping or hiking planned this last bit of Summer.
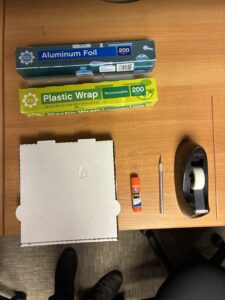
Each Kit Includes (List):
- 1 Pizza Box
- 2 Sheets of Plastic Wrap
- 3 Sheets of Aluminum Foil
You Will Need From Home (List):
- Something that can cut– Scissors, X-Acto Knife
- Glue or Gluestick
- Tape
- Some kind of Food (Chef’s Choice)
- (Optional) A Stick
Step Paragraphs:
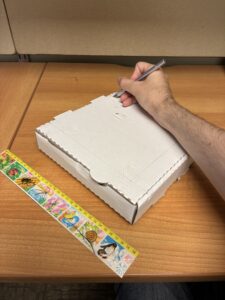
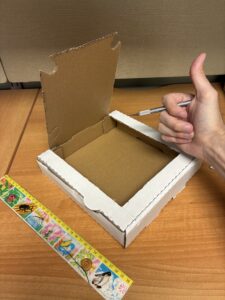
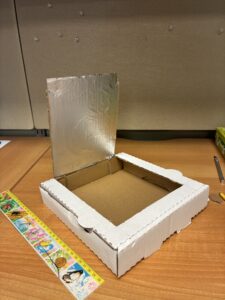
Step 1: Standard Structure
Cut a three-sided flap out of the top of the box, leaving a border around the three sides of about an inch of cardboard. The flap should go all the way to the back of the box. You can trace your cuts beforehand like I did, or just try to cut it out freehand.
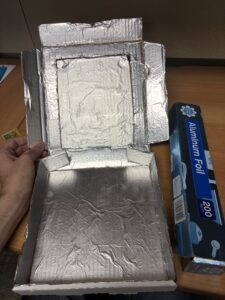
Step 2: Harness the Heat
Cover the box’s entire interior with aluminum foil, including the inside of the flap you just cut out. I found it best to cover the cardboard with the glue first, and then make sure the foil is as smooth as possible (the better to reflect heat and light with).
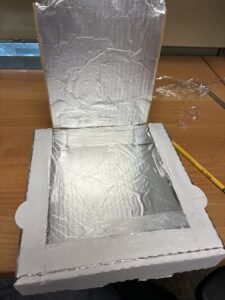
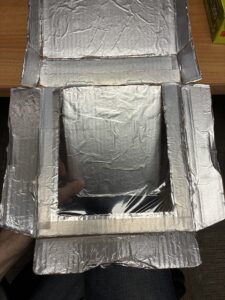
Step 3: Window Dressing
Tape two layers of plastic wrap across the opening you cut in the lid—one layer on the top and one layer on the bottom side of the lid.
Step 3½: Decorate!
You can decorate the box at any point in the process, with whatever method or materials you like– and I encourage you to do so! While not technically necessary for the operation of the Solar Oven, I think that drawing flames all around the border of the box would really give my food an extra kick.
Step 4: The Great Solar Oven Cookoff!
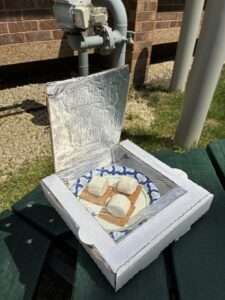
With your oven fully built, decide what you want to make first! You can reheat or cook food inside it by simply setting your solar oven down facing the sun, on a sunny day, with temperatures ideally 85 degrees Fahrenheit or higher. Reheating may be the easiest first option, but if you’re looking to cook, easy first recipes include Nachos (shredded cheese melts pretty quickly over tortilla chips) and S’Mores, which I’m providing instructions for here as an example.
To make S’mores, I preheated the oven outside in the sun for about 30 minutes, then placed my Graham Crackers with a Marshmallow on top inside. You’ll want to place your food on something so it doesn’t melt onto and ruin the oven– something reflective like an aluminum pie tin, but a plate will do fine in a pinch.
From there, wait 45 to 60 minutes for your marshmallows to get squishy to the touch, which means you’re ready for the next step. Open the oven and place a piece of chocolate on top of each marshmallow, and another graham cracker on top, squishing it all down. Then, close your lid and wait for a few more minutes, just giving the chocolate time to melt.
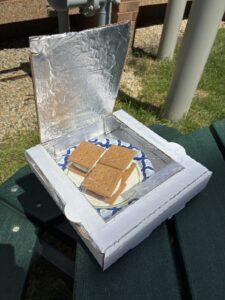
My final step was just to enjoy the food I made with my friends, and I hope your last step will be the same. Here’s to some lovely summer cooking!