Below are the instructions for the July 2025 Grab & Go kits! Grab one only in the Youth Department at the Library. While supplies last.
PLEASE PAY ATTENTION TO THE GRADE RECOMMENDATIONS!
Yarn Art
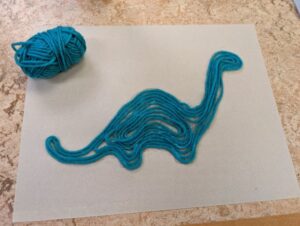
Be as creative as you’d like with this ball of yarn and piece of paper. Create any design that you want or, like me, make a dinosaur!
Each kit includes:
- 1 mini ball of yarn
- 1 sheet of paper
Supplies you’ll need:
- Crayons, markers, or other art supplies
- Scissors
- Glue
Instructions:
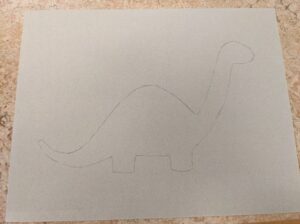
- Trace the design you’d like on your piece of paper.
![prek k gg july 25 2]()
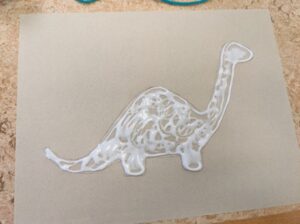
- Next, fill your shape with glue. Be careful, you only need a little bit! I traced the outline with glue and then filled in the shape with glue as well.
![prek k gg july 25 3]()
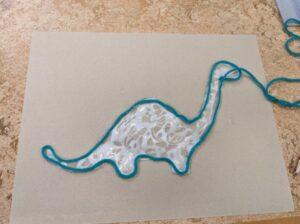
- After that, cover your design with yarn! I found it easiest to create the outline and then fill the yarn in to create one massive loop. You can also start from one end and go to the other with your yarn. Be patient as it takes some time to fill in all the space. Your hands will get messy with glue in the process, but it will be worth it!
![prek k gg july 25 4]()
- Depending on your design, you might have extra yarn left over. If you have a piece of paper at home, create a new design with a new shape! Is it easier or harder to do yarn art with a really small shape? Or create the same design but fill it in differently. Which method made it more difficult? Why do you think that is?
Make Your Own Pinwheel!
This month’s activity uses your creativity to make your own pinwheel!
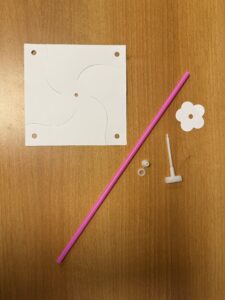
Each kit contains:
- 1 colored straw
- 1 paper flower
- 1 paper fan
- 1 plastic fastener
- 1 plastic needle connector
You will need:
- Markers, colored pencils or crayons to decorate
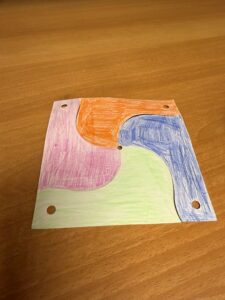
- Plan your design. What do you want your pinwheel to look like?
![IMG 7645]()
![IMG 7646]()
- Color the paper flower and the pinwheel. Color both sides.
- Separate your fastener into two pieces: a small circle and a peg.
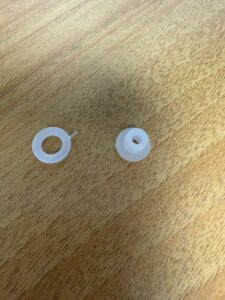
![IMG 7630]()
- Place the small white peg in the center of the flower.
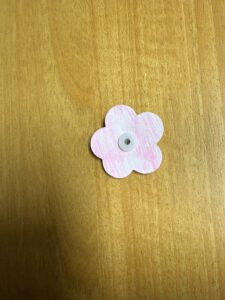
![IMG 7641]()
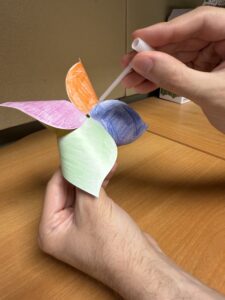
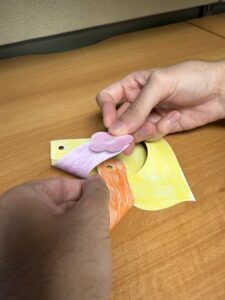
- Holding the flower and fastener over the paper flower, bend each of the 4 edges with holes up toward the flower. Push the fastener through the hole of each of the four sides.
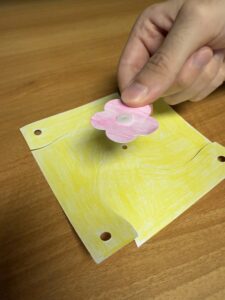
![IMG 7642]()
![IMG 7643]()
![IMG 7644]()
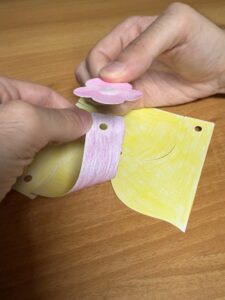
- Place the small circle on the back of the fastener and push together to create the pinwheel.
![IMG 7648]()
![IMG 7647]()
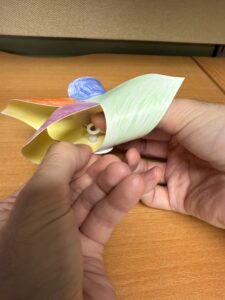
- Take your needle connector and push it through the back of the pinwheel until it locks in place with the fastener.
![IMG 7649]()
- Take your straw and push it into the needle connector.
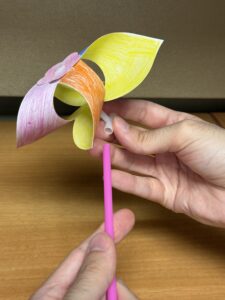
![IMG 7650]()
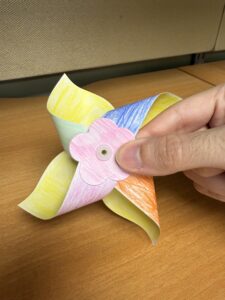
- Your pinwheel is complete! Test it out!
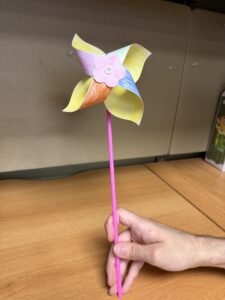
![IMG 7651]()
- Have fun!

Flower Sunglass Strap
Each kit includes:
- 44 inch elastic bead string
- 6 green pony beads
- 12 pony beads (these are your ‘flower petals’)
- 2 glow in the dark pony beads
Instructions:
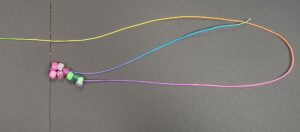
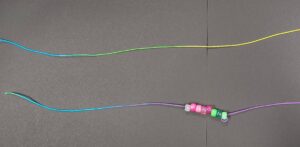
- Lay your bead string on a flat surface in a loop with the two ends on the left. Visualize where you want your flowers to go – the closer to the ends, the closer they will be to your ears. I chose to go about halfway.
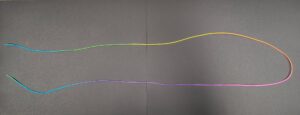
![Step1]()
- String a green bead up to the point you want your flower stem to start. Thread the end around and through it to make it secure.
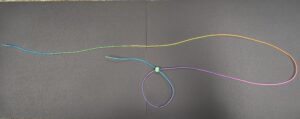
![Step2.1]()

![Step2.2]()
- String on two more green beads + four of your ‘flower petal’ colored beads + one clear bead
![Step3]()
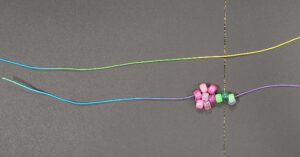
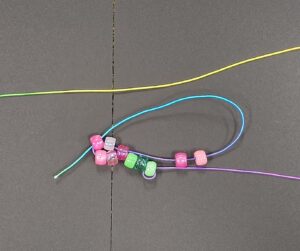
- Bring your thread through the first ‘flower petal’ bead (the one next to the green bead) and pull all the way through. Be gentle when you pull – hold onto the green beads so they don’t move.

![Step4.1]()
![Step4.2]()
- Thread 2 more ‘flower petal’ beads onto the string. Thread the end through the bead next to the clear “center” bead that is farthest from the green “stem” beads.
Gently pull the thread through so it is snug (not too tight). Be sure to hold onto the green beads while pulling so they don’t move.
![Step5.1]()
![Step5.2]()
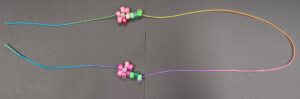
- Repeat Steps 1 – 5 on the other side.
![Step6]()
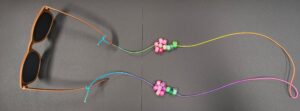
- Tie the ends to your sunglasses, using a triple knot. Feel free to trim the edges, or leave them so you can transfer the sunglass strap to different pairs of glasses!
![Step7]()