
Below are the instructions for the June 2025 Grab & Go kits! Grab one only in the Youth Department at the Library. While supplies last.
PLEASE PAY ATTENTION TO THE GRADE RECOMMENDATIONS!
Rainbow Paper Plate
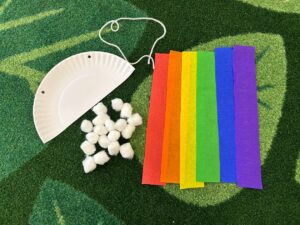
Each kit includes:
- A half plate with holes punched through the top
- Cotton balls
- Streamers
- Yarn
Supplies you’ll need:
- Glue
Instructions:
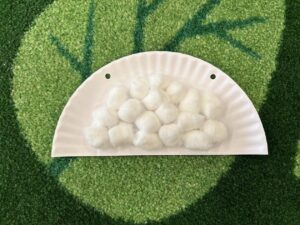
- Glue your cotton balls to the paper plate.
![IMG 7131]()
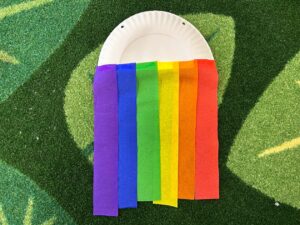
- Turn the plate over and glue the rainbow streamers to the back. You have to overlap them a bit. You can do any order, but if you want to do rainbow order it is: red, orange, yellow, green, blue, purple.
![IMG 7132]()
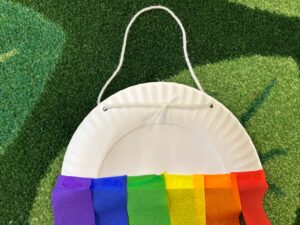
- Feed the string through the holes and tie the ends together in back.
![IMG 7133]()
- Admire your rainbow! Hang it on a door or window!
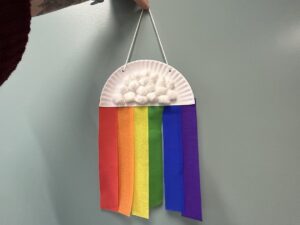
![IMG 7134]()
Enjoy some books about rainbows or Pride Month!
- Let’s Make a Rainbow!: Seeing the Science of Light with Optical Physics by Chriss Ferrie
- The Rainbow Parade: A Celebration of LGBTQIA+ Identities and Allies by Shane Jordan
- Make Your Own Rainbow: A Drag Queen’s Guide to Color by Lil Miss Hot Mess
- A Rainbow in you Cloud by Amina Mucciolo
- I’m a Photon by Dr. Eve M. Vavagiakis
Instructions for Grades 1-4 can be found in each kit.
Rainbow Kumihimo (Jellyfish) Bracelet Weaving
Included in kit:
- 7 strands of embroidery floss in individual bags
- Cardstock circle
Supplies needed:
- Scissors
- Writing instrument

Instructions:
- Take everything out of the brown bag and grab a pair of scissors and something to make marks on the circle with (we used a permanent marker but anything will work)
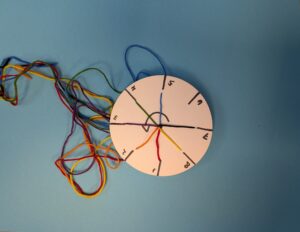
- Mark 8 dashes around the circle like the image below, they don’t have to be perfectly spread out but do your best to evenly distribute them. Cut slits on the 8 lines marked, making sure they go less than halfway to the center of the circle. Optional: add an arrow to remind yourself what direction you are turning in
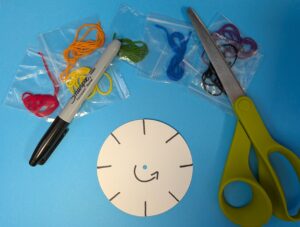
![kumihimo step 2]()
- Line up the ends of each string and tie a knot, leaving a couple of inches past the knot to use to fasten the bracelet later.
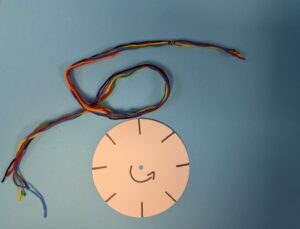
![kumihimo step 3]()
- Pull the longer end of the strands through the hole in the center of the circle, the knot should remain on the underside (no writing) side of the circle. Optional: slightly widen the center hole using a pencil or chopstick if you are struggling with this step.
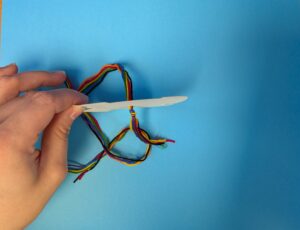
![kumihimo step 4]()
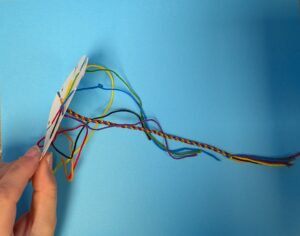
- Place each strand in one of the slots going around the circle, leaving one slot empty (I did rainbow order with black on the end but you can do it in whatever order you like). Optional: add numbers next to each slot to help you keep track of which slot is which
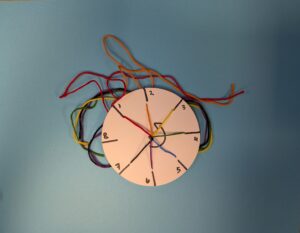
![kumihimo step 5]()
- Grab the third strand from the empty slot (clockwise) and move it to the empty slot (for me this was yellow in slot 3 being moved to slot 8).
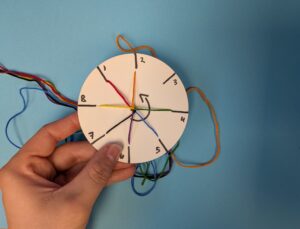
![kumihimo step 6]()
- Rotate in the direction marked on your arrow until the empty slot is in the 9 o’clock position (optional but I find it helpful). Take the third strand from the empty slot (clockwise) and move it to the empty slot (for me this was purple in slot 6 moved to slot 3).
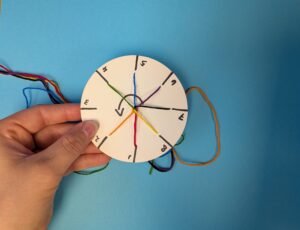
![kumihimo step 7]()
![kumihimo step 7.5]()
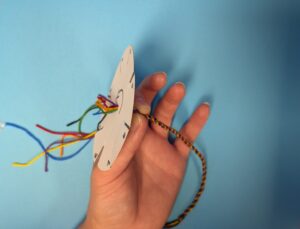
- Continue this process until it reaches your desired length, the bracelet will start forming through the center hole. Tip: pull the bracelet taught periodically and comb the dangling strands to prevent tangles (these dangling strands are what earned this technique the nickname of Jellyfish bracelets.)
![kumihimo step 8]()
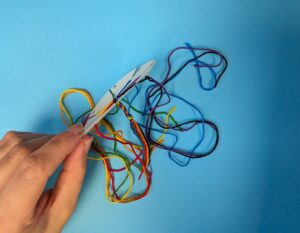
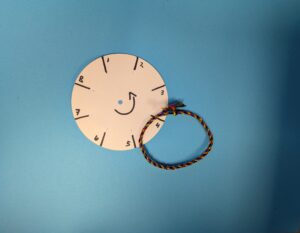
- Unhook the strands from their slots, pinch where your “braid” stopped and pull the ends through the center hole. Tie a knot where you ended your bracelet and use the ends to tie it on to your wrist (or a friend’s). Cut off the excess string.
![kumihimo step 9.1]()
![kumihimo step 9.5]()
![kumihimo step 9.9]()
You can reuse the weaving template over and over again to make bracelets with any 7 strands of string, if you want a sturdier template, trace this one on cardboard and carefully poke a hole in the center!