Below are the instructions for the March 2026 Grab & Go kits! Grab one only in the Youth Department at the Library. While supplies last.
PLEASE PAY ATTENTION TO THE GRADE RECOMMENDATIONS!
Instructions for the PreK and K activity can be found in each kit.
Note: this kit contains small parts!
Make a Rainbow Bookmark!
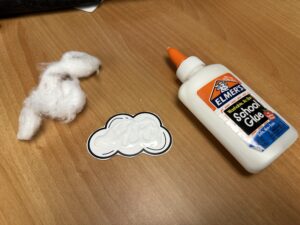
Included in each kit:
- Cloud cutouts
- Cotton balls
- Adhesive popsicle stick
Materials needed from home:
- Glue
- Markers, crayons, or colored pencils
- Scissors
Steps:
- Using scissors, cut out the two clouds included in the kit. Don’t worry if your cutting isn’t perfect…it doesn’t need to be!

![Step 1 March grab and go]()
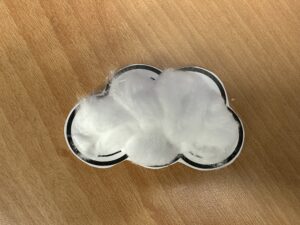
- Using your fingers, pull apart the cotton balls to make them bigger.
- Spread glue all over both clouds.
![step 3 March grab and go]()
- Push the cotton ball into the glue on each cloud and let dry.
![step 4 March grab and go]()
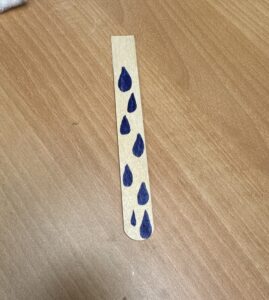
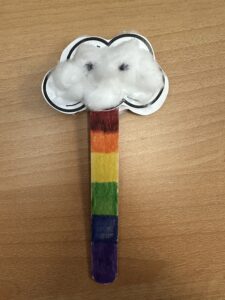
- Take the popsicle stick. You can color both sides any way you choose! Maybe you want two rainbows. Maybe you want a rainbow on one side and raindrops on the other. Maybe you want a rainbow on one side and flowers on the other. Whatever you choose is awesome!
![step 5 March Grab and go]()
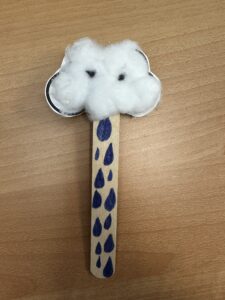
- Peel off the sticky tab at the top of the popsicle and use that to stick one cloud to the popsicle stick.
![step 7 March grab and go]()
- Use glue to attach the other cloud to the other side of the popsicle stick.
![step 6 March grab and go]()
- Let dry.
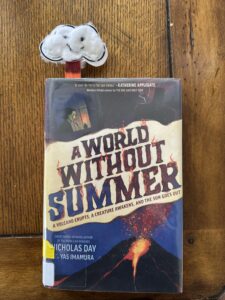
- Use your bookmark in the next book you read!
Embroidery Floss Initial
Each kit includes:
- A piece of cardboard
- 3 colors of embroidery floss

You will need:
- A pencil
- Scissors
- Tape
Instructions:
- Sketch the block letter you want to make. It can be your initial, or the initial of someone you want to give it to!
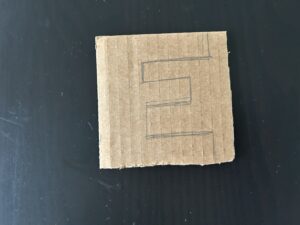
![IMG 0217]()
- Cut out your letter. If your grown up has a box cutter, ask them to cut it out for you.
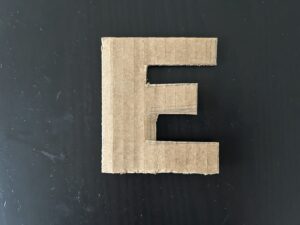
![IMG 0218]()
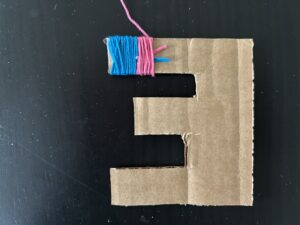
- Tape the first color of embroidery floss to the back of the letter.
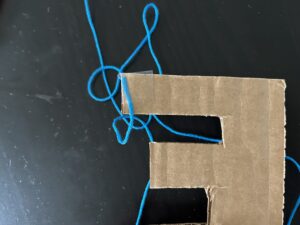
![IMG 0219]()
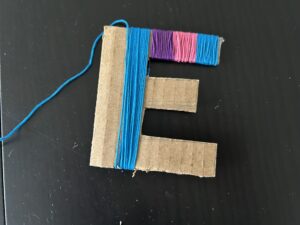
- Wrap it around until the stripe is as big as you want it.
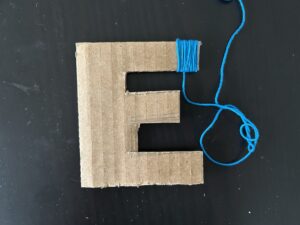
![IMG 0220]()
- Tie your next color to the color you’re using, and cut to make the ends shorter. Wrap your next color around, tucking the tails under as you go. Note, if you’re having a hard time tying the strings, just tape the end of the color you’re using, and the start of the next color to the back of the cardboard each time you switch colors.
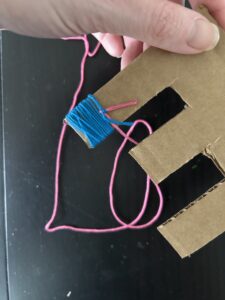
![IMG 0222]()
![IMG 0223]()
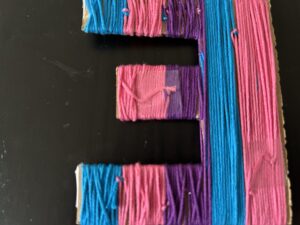
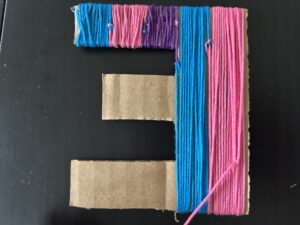
- Keep repeating with all of the colors. You may have to get creative to figure out how best to wrap your particular letter.
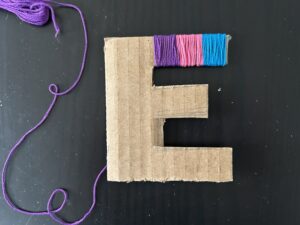
![IMG 0225]()
![IMG 0226]()
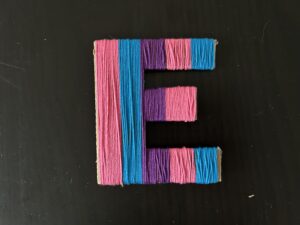
- You may get to a point where you have to just tie the current color off and start somewhere else. You can try to loop and tie it to another strand on the back, or you can just tape it off. Repeat until it’s all covered!
![IMG 0227]()
![IMG 0228 scaled e1773433188379]()
- You’re finished!