
Below are the instructions for the September 2025 Grab & Go kits! Grab one only in the Youth Department at the Library. While supplies last.
PLEASE PAY ATTENTION TO THE GRADE RECOMMENDATIONS!
Handprint Ladybug
In this month’s Grab and Go, you will use your handprint to create a ladybug!
Each kit contains:
- A black ladybug template
- A piece of red paper
You will need:
- Kid-friendly scissors
- Glue
- Black crayon or marker
Instructions:
- Cut out your black ladybug. If you need help, ask your grown-up.
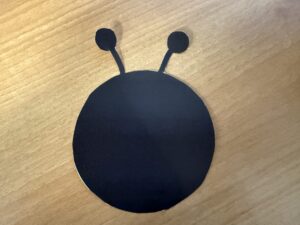
![IMG 7789 scaled e1757612639311]()
- On the red paper, trace around both of your hands.
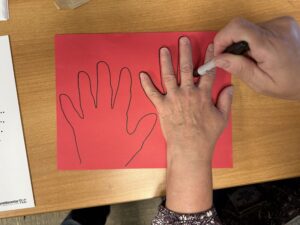
![IMG 7785]()
- Cut out your handprints.
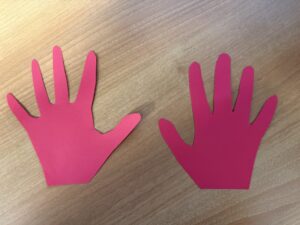
![IMG 7790 scaled e1757612715571]()
- Color black dots on the red handprints.
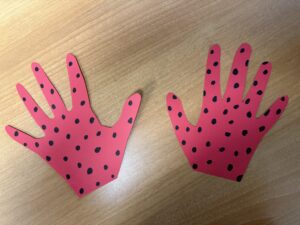
![IMG 7791 scaled e1757612690844]()
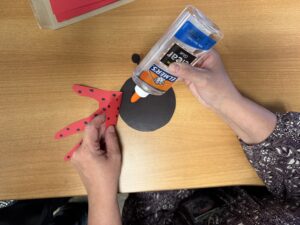
- Glue the handprints on to the black ladybug to create wings!
![IMG 7792]()
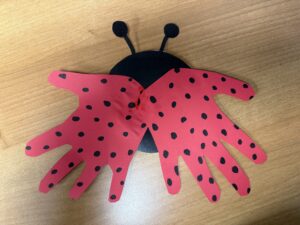
Admire your new ladybug friend!
Scratch-Art Bookmark
A new school year means new books to read! Keep your place in the latest, greatest book you’re reading with this cool scratch-art bookmark.
Instructions:
- Make sure the hole is at the top of the bookmark before you start creating your design.
- Using the stylus included (be careful: it’s pointy!), draw a design on the bookmark. You can write words, draw pictures, or create a geometric design! You can use a sharpened pencil or unbent paper clip to get different effects, if you want.

![IMG 9870]()
- Fold the ribbon in half.
- Thread the closed loop through the hole at the top of your bookmark.

![IMG 9871]()
- Lift the two open ends through the closed loop and pull.

![IMG 9872]()
- Use your bookmark to keep your place as you read a great book from the Deerfield Public Library!
![IMG 9875]()
Miniature Beaded Plant
Make yourself a little plant that will stay green no matter what!
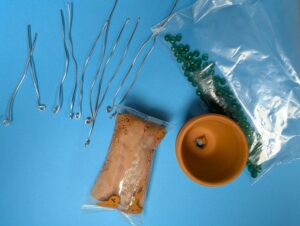
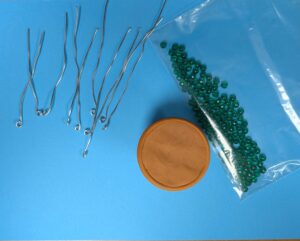
Supplies Provided:
- 10 pieces of precut wire
- A bag of green beads
- A tiny terracotta pot
- Brown air dry clay
Supplies Needed:
- School glue (optional)
Instructions
- Fill the terracotta pot with the air dry clay, do your best to press it in so there are no gaps inside (the clay should sit close to flush with the rim of the pot).
![clay in pot]()
- Set aside and let the air dry clay harden for at least 8-12 hours, this ensures that the wire can’t move around as much once poked in.
- Add beads to wire, leaving at least 1-1.5 inches empty at the top.
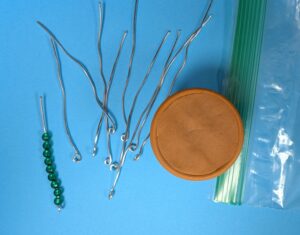
![PXL 20250908 232613445]()
- Bend the end of the wire down to create an arch shape (the wire bends easily by hand).
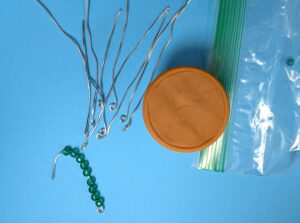
![bent wire]()
- Poke the end of the wire into the dried clay, pushing it in until all the unbeaded wire is hidden inside the clay. If you have school glue at home add a small amount to the bare wire before poking it into the clay for added security.
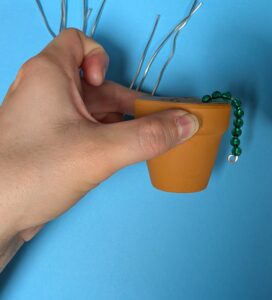
![first strand in]()
- Repeat steps 3-5 for the remaining pieces of wire, evenly spreading them out throughout the top of the clay to create a fuller “plant.” Tip: try alternating between longer and shorter pieces of wire for a more “natural” look!
- Bend the beaded strands by hand to add curves and curls as desired.
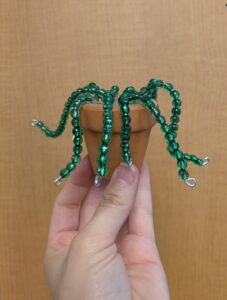
![finished plant]()
Note: If you didn’t use glue the wire will come out if the plant is flipped upside down or knocked over, but it will stay together if left alone on a shelf.