
Below are the instructions for July 2023 Grab & Go kits! Grab one at our outdoor Creation Station or stop by the Youth Department at the Library. While supplies last.
PLEASE PAY ATTENTION TO THE GRADE RECOMMENDATIONS!
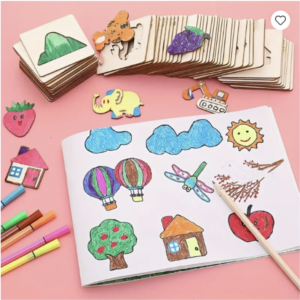
Kids DIY Drawing or Painting Stencils
- Color your stencils.
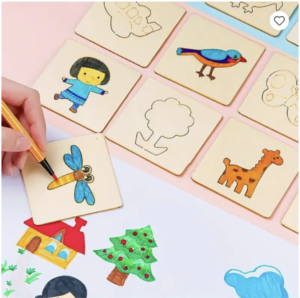
2. Or pop them out and color them!
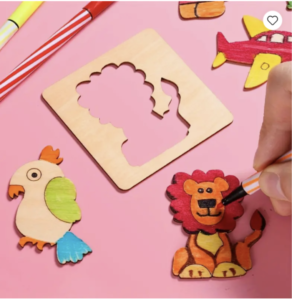
3. Use your stencils to draw more pictures.
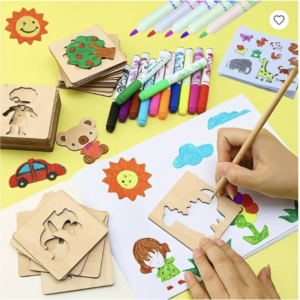
4. Share your stencils with friends and make a stencil story!
Design Your Own Flag
During the month of July, there are usually a lot of American flags flying everywhere. What if you were in charge of designing your OWN flag? Maybe it’s for a made-up country…or maybe it’s just for who you are!
- Think of what elements might be on your flag. Plan your design.
2. You can lightly sketch your design on the flag, using a pencil (not provided).
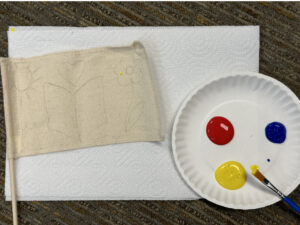
3. Choose what colors should be on your flag. We’ve given you red, yellow, and blue paint, so you can use those or combine them to make secondary colors (purple, orange, or green).
4. Spread paper towels or newspaper under your flag.
5. Paint* your design on your flag (*paint is washable, but might stain clothes or other items). Let it dry.
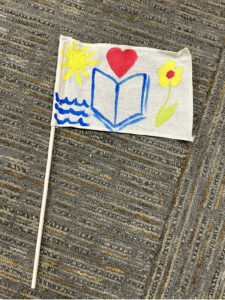
6. Now proudly wave your flag!
Pride: The Story of Harvey Milk and the Rainbow Flag
Kit Contents:
- 2 white erasers
- 1 carving tool (the tip is wrapped in electrical tape so it doesn’t poke through the bag)
- 1 ink pad
Supplies needed:
- A pencil
- Paper
Instructions
- Trace the eraser(s) onto a piece of paper
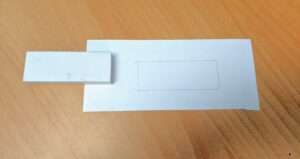
2. Draw your design within the rectangle how you want it to look when stamped (i.e if you are doing text just write it normally) Once satisfied with your design go over it once more with the pencil to darken the lines. Tip: Try simple designs and patterns for you first stamp to get used the carving tool
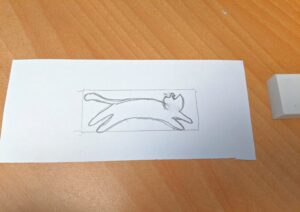
3. Place the eraser down on the drawing and press it down, when you remove it you should have a faint mirrored outline of your design
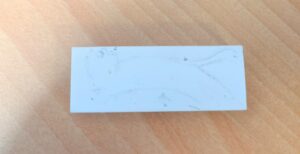
4. Fill in the outline and shade in all the area that you don’t want to be in your final design
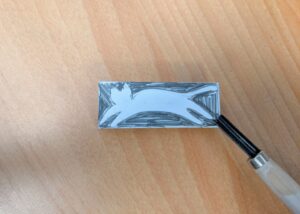
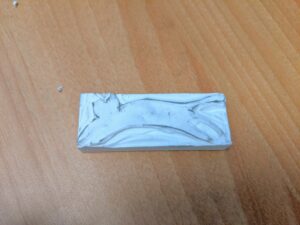
5. Carefully carve away the shaded area until you think you have carved it all away. Ink up your new stamp and press it onto some paper! If more than you want is showing up when you stamp, carve those parts away until your stamp is how you want it. I ended up not liking my first attempt so I ended up doing a slightly different design on second one which you will see in the last image.
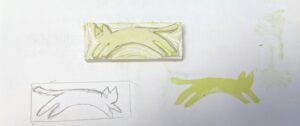
Important note: Only use carving tools in the presence of an adult and carve away from yourself. It may be easier to turn the eraser under the carving tool than turning the tool
Tip: you can make stamps out of the classic pink erasers too! I got white so the designs would show up a bit better.