Hello Teens! This month’s Grab & Go craft is a two-sided felt Love Monster Plushie!
 Everything you need except for scissors and glue can be found in the kit which is available at the outdoor Creation Station at the Library. Teen kits will have a blue ‘TEEN’ sticker on them. It looks like this:
This craft may take a bit of time and careful attention if you have never sewed before but don’t worry, you got this! If you run into any trouble you can always email me at cbueno@deerfieldlibrary.org and I’ll try to help you along.
Step 1. Choose or draw your monster shape – there’s one in the bag already for you but you may want to check out a different one online or create your own. I found my monster pattern and a few others on a blog called Its Always Autumn.
Step 2. Trace your shape onto your felt pieces. I used a white gel pen but you can use anything you have at home that will show up on your felt colors.
Step 3. Cut out your two felt monsters. Sewing scissors work best if you have them but you should still be able to cut as long as you have any pair of adult scissors.
Step 4. Decorate your two monster sides! I took the easy route and glued on my pieces but you can sew them on if you want. I suggest a hot glue gun for the best results. I used some of my scrap fabric to try out as a mouth but ended up using it as hair

Step 5. OK, now we’re ready to sew! Thread your needle with a nice long piece of thread and tie the end with a good firm knot. If you run out of thread as you are sewing that’s ok! Just knot wherever you stopped and re-thread your needle and keep going. Place your felt pieces together back to back and sew all around the edges until you get back to the head (You’ll want to leave this open a little bit to put in the stuffing).
For any teens out there with sewing experience, you do what works best for you. It has been a while since I’ve sewn by hand and I have 2 suggested ways you can tackle this as a beginner.
- First, you can use a really simple running stitch. Poke the needle through both pieces of fabric and back through from the other side. Think of it as the needle and thread running back and forth through the two pieces of felt as you go around. It will end up looking like the picture below but you’ll want to be careful not to leave too much space between stitches because then the stuffing will poke through. Feel free to tug a little at the thread between stitches to close the gaps.
![Felt monster sewing 1]()
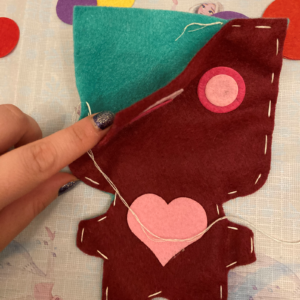
- I ended up using a simplified ‘whip stitch’ for my final plushie. This is where you kind of sew over the edge of the felt. You poke the needle through both layers of fabric but instead of poking it back through from the other side, you’re going to pull the needle over the edge and back through the same side you started with. So if I started by poking my needle through the red side, I’m always going to poke my needle through the red side first. These stitches will be a little less visible than the running stitch.

![Felt monster sewing 2 1]()
Step 6. When you’ve finished stitching almost the entire way around remember to stop and stuff your plushie before putting on those final stitches and knotting it tight. I used a pencil to help poke some stuffing into my arms and legs.
Step 7. Once you’ve stuffed and stitched you’re done! You did it! You can always glue on more details if you like. I ended up sewing on some strips of felt as hair for mine.
Enjoy your hard work and your new plushie!
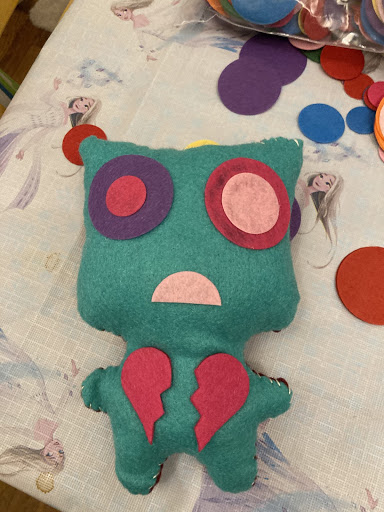
Here are the two sides of my plushie! I made a lovey-dovey side and a brokenhearted side.